Geared Heart Keychain – A Thingiverse “Featured” Model

Ah to be Featured!  (it totally made my week)
“It was all part of the quest (to be featured) and now that the popularity ride is over it only leaves me wanting more.”

The idea of creating something that could be a “hit” on Thingiverse has been a frequent topic of conversation in the 3D Modeling and Fabrication classes I’ve taught for the past two years. With so much talent on Thingiverse I feel quite lucky to have my 3D Geared Heart  featured.

I continue to find it interesting to hear the challenges that some folks have had and the reaction to the model when it works as planned.

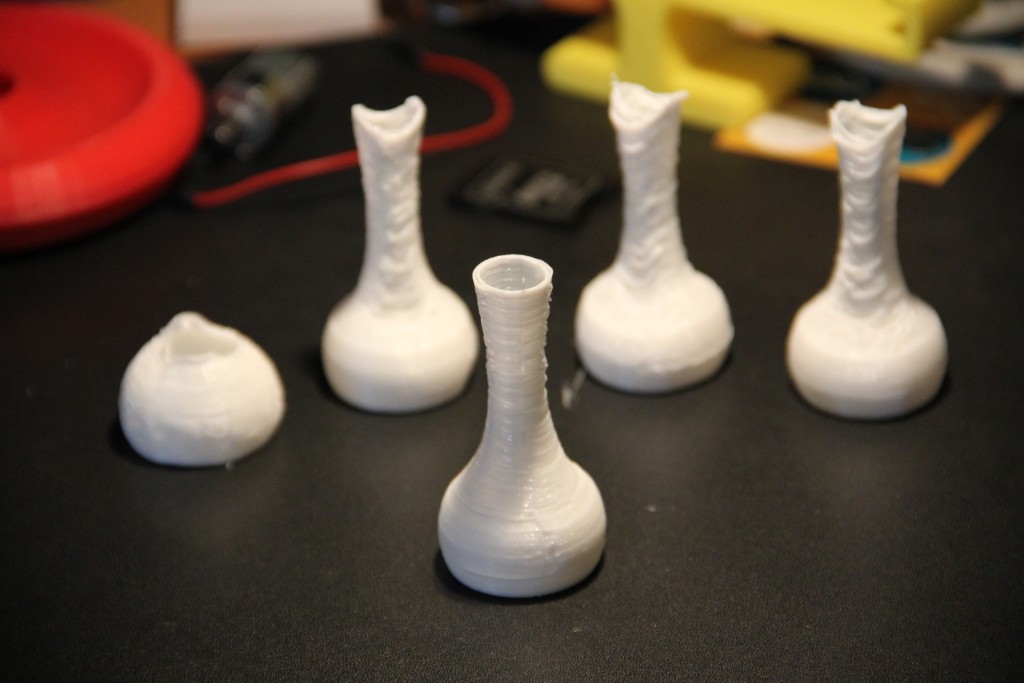
The model was meant from the very beginning to be an easy single print (print in place) design that required no support or raft removal. We also wanted it to be something that had moving parts and wasn’t too large or time consuming to print.

Using the “standard” settings on a Makerbot or Ultimaker it usually take only an hour to print and should come off the build plate with moving gears.

Many people have thanked me for sharing my design and some of asked to use it for different purposes. The feedback from the community has been nearly all positive and in some cases touching.

Comment: Thank you for a great design. I run a small charity in the UK, one of the issues is cardiac problems. So I have printed red with white gears which is our charity colours. Our members love them. As do the cardiac staff at the local hospital.

A great design not just for Valentine’s

Our site is http://costellokids.com


Screen Shot 2015-02-24 at 12.57.11 AMAlthough there were lots of folks saying nice things it is obvious that there are still going to be people out there that are looking to make a buck off your model. It only took 9 Days until I found it showing up on a website in India being sold for 320 Rs. (~$5USD) .

This isn’t the first time something like this has happened to one of my designs. The day I posted the heart on  Thingiverse I asked a co-worker if he wanted to print one by which he quickly quipped, “no, I’ll just buy it on ebay next week.”


DATA – the ups and downs of internet popularity

From a data and statistics standpoint it is interesting to look at the climb and fall of the “Featured” items in relation clearly less popular designs. It would be really interesting to be able to see where most of the traffic is coming from and when are the most popular times of the week. Even if that isn’t available it is still nice to get this view:

Screen Shot 2015-02-24 at 1.10.14 AM


A Few Final Thoughts… 

Talking with people in person I find that most folks quickly get around to the question of “How much money did you make on your design?”  Trying to explain that my model has been downloaded over 11,000 (update: 18,000) times and that I didn’t expect any money from it when posting it is something that makes folks question the whole Open Source/Maker movement that I often talk about in the Innovation Lab.

(2am, bedtime) … More to come…later.

The Voronoi Remixed 3D Printed Owl


Owl VoronoiTHE IDEA:
My 6 year old is really in to owls at the moment. Her Owl Themed Birthday party was loads of fun and that led me, as a good hacker Dad, to play around with some of the popular owl models available on Thingiverse.

I borrowed the older Makerbot Replicator Dual for the weekend, mainly to print out an Owl Cookie Cutter I made in Sketchup 8 (that’ll be a different post). But after printing out the cookie cutter I found myself replacing a stepper motor and rebuiling the extruder (that hasn’t worked for a year). To celebrate this rebuild I looked for a good dual extrusion print to try.  Since I couldn’t find a good owl one, yes we’re still on an owl kick, I remixed our favorite owl from Tom Cushwa using a Voronoi pattern.

The files can be found on Thingiverse here.

THE PROCESS:
I started with MeshLab and struggled through the soundless tutorial below. Then I took the result and did some MeshMixer boolean runs to create the two separate .obj files.  I finished it all off with a trip to NetFabb’s online file repair tool. The whole process took a whole lot longer than I thought it would but so far the results have been pretty nice for a first go at it.  (I am tempted to do a video of the whole thing if anyone would be interested?)

Printing Topless… and Bottomless

Sometimes you run across great models/files on Thingiverse or elsewhere on the net that are solid objects that you’re supposed to print without a “roof” or top layer. The same is sometimes true about printing objects without a floor or bottom.

If you’re using Cura, Slicer or other non-Makerbot software you can find these setting available in the advanced settings, but on Makerware/Makerbot software it is a bit tricker. You’ll need to create and modify a custom profile.

I am not sure why they don’t simply create an “Expert” tab that allows for simple check boxes to turn these features on and off. There have been a couple of folks posting tools to give it that functionality but some of them are more complicated than what we’ve done here.

(Wow, I just checked YouTube and don’t see a video that I thought would be there…. )

Screen Shot 2015-03-03 at 12.30.01 AMTo edit your profile: Go to the “Settings” tab and then click and expand the “Advanced options” . At the bottom you’ll see a “Create Profile” button. Click it and give it a meaningful name.

I often put many of the settings in the name title, S2F20L02 (for shells:2, Fill 20%, Layer Height 0.2mm).

Now you can click on “Edit Profile” if you have TextWrangler on your computer then I suggest using that.

These are the lines that I changed in my file. Note that we have two MakerBot printers with dual extruders so I like to make put a temp in for each extruder.

Screen Shot 2015-03-03 at 12.12.17 AMThese variables are spread through out the miracle.jason settings file so it might be easier to edit with a program like TextWrangler, BrioFlexTrack4which is my preference.

"extruderTemp0": 220,
"extruderTemp1": 220,
"platformTemp": 60,

"roofThickness": 0.0,

"floorThickness": 0.0,

"infillDensity": 0.0,

"doRaft": false,

You can see my entire settings file and one I have used for NinjaFlex (with a special extruder) on my GitHub here.

If you are feeling daring or want to try out other features hidden away here refer to MakerBot’s Custom Slicing documentation here.
Thing shown: “Brio Flex Railtracks” by romanjurt
http://www.thingiverse.com/thing:661462


NinjaFlex – Flexible 3D Printer Filament in a MakerBot Replicator 2X

simple 3d printed vase in ninja flex
NinjaFlex printed “Simple Vase”

Take Away:
Definitely a challenge to print with but the rewards might be worth it depending on your end goals.

The Journey:
It might have taken a day or two worth of fiddling around to get the extruder together on our MakerBot Replicator 2X using MakerBot’s extruder upgrade kit ($8: consists of a spring, bearing and a screw). The instructions for the upgrade on the Makerbot site is for a Replicator 2 (NOT the 2X) and the thickness of the extruder block and how they line up are all different so that was a dead end at first.

I ended up using the Thingiverse extruder files created by 3FPD (our make pic: http://www.thingiverse.com/make:87985) and I finally got the stuff to load without bending and buckling (too much).

Lastly it took a day or two of fiddling with the MakerBot profiles to find the right mix of heat/retraction/speed and so on to get a successful print. (for us it didn’t work with the recommended settings and temps)  Above you’ll see some of the prints leading up to the pretty well done Simple Vase print.

The MakerWare (now MakerBot) profile that I used to create the finished “simple vase” and the iPhone 5 bumper posted by Adafruit

One Cubic Foot Connector – with MakerBot Customizer

Purpose and Inspiration:

One Square Foot - CubeIn the Innovation Lab this week we had a request from an M-Term trip to create connectors for a group students going to French Polynesia to study marine and coastal ecologies and their biodiversity.

The trip wanted us to create 3D printed corner connectors for the “One Cubic Foot” cubes they were building out of broken or damaged arrow shafts. This project was inspired by National Geographic’s coverage of David Liittschwager’s work (video)

Customize it!
Since there was a good chance that not everyone has broken arrows laying around I took this as the perfect excuse for me to finally learn the basics of MakerBot’s Customizer tool that allows Thingiverse users to create custom 3D files for printing. Users are able to change the radius of the holes and wall thickness in the model and then save the resulting custom-sized corner piece to be printed.

Screen Shot 2014-02-21 at 11.20.51 AMThe tool uses the OpenSCAD modeling language which creates the model from a series of commands. Some of the documentation is great but it definitely has a steep learning curve. Perhaps I’ll create a video tutorial if time permits (before I forget it all).

Result:
It is still in beta since there are a couple of tweaks to be added but it’s up and functional: http://www.thingiverse.com/thing:253081

One Cubic Foot Connector

One Cubic Foot Connector

Deer track

Deer track

Completed "Cubic Foot"

Completed “Cubic Foot”

MakerBot Customizer Corner tool

MakerBot Customizer Corner tool


For those interested in David Liittschawager’s book you can find it here: A World in One Cubic Foot: Portraits of Biodiversity

Un-clogged MakerBot and BlueSmirf prep

A quick test print after filament

A quick test print after filament

Our MakerBot Replicator Dual needed some help. One of the extruders was clogged. It was the type of clog that could only be fixed by partial disassembly. It seems to be pretty happy now but the filament loading sequence seemed to produce an extrusion that periodically sounded like it was slipping. This test print seems to have worked out fine, so we’ll just keep an eye on it.


BlueSmirf

bluetooth for Arduino

Bluetooth hardware with pins added

A BlueSmirf is a bluetooth modem that can be integrated in to Arduino based systems. I’ve added some pins that I’ve bent to allow the card to be positioned vertically from a breadboard for easy test and hopefully better range. The bent pins will likely work well if we plan to integrate it in to a headband or other wearable project later on.