Printing Topless… and Bottomless

Sometimes you run across great models/files on Thingiverse or elsewhere on the net that are solid objects that you’re supposed to print without a “roof” or top layer. The same is sometimes true about printing objects without a floor or bottom.

If you’re using Cura, Slicer or other non-Makerbot software you can find these setting available in the advanced settings, but on Makerware/Makerbot software it is a bit tricker. You’ll need to create and modify a custom profile.

I am not sure why they don’t simply create an “Expert” tab that allows for simple check boxes to turn these features on and off. There have been a couple of folks posting tools to give it that functionality but some of them are more complicated than what we’ve done here.

(Wow, I just checked YouTube and don’t see a video that I thought would be there…. )

Screen Shot 2015-03-03 at 12.30.01 AMTo edit your profile: Go to the “Settings” tab and then click and expand the “Advanced options” . At the bottom you’ll see a “Create Profile” button. Click it and give it a meaningful name.

I often put many of the settings in the name title, S2F20L02 (for shells:2, Fill 20%, Layer Height 0.2mm).

Now you can click on “Edit Profile” if you have TextWrangler on your computer then I suggest using that.

These are the lines that I changed in my file. Note that we have two MakerBot printers with dual extruders so I like to make put a temp in for each extruder.

Screen Shot 2015-03-03 at 12.12.17 AMThese variables are spread through out the miracle.jason settings file so it might be easier to edit with a program like TextWrangler, BrioFlexTrack4which is my preference.

"extruderTemp0": 220,
"extruderTemp1": 220,
"platformTemp": 60,

"roofThickness": 0.0,

"floorThickness": 0.0,

"infillDensity": 0.0,

"doRaft": false,

You can see my entire settings file and one I have used for NinjaFlex (with a special extruder) on my GitHub here.

If you are feeling daring or want to try out other features hidden away here refer to MakerBot’s Custom Slicing documentation here.
Thing shown: “Brio Flex Railtracks” by romanjurt
http://www.thingiverse.com/thing:661462
 

NinjaFlex – Flexible 3D Printer Filament in a MakerBot Replicator 2X

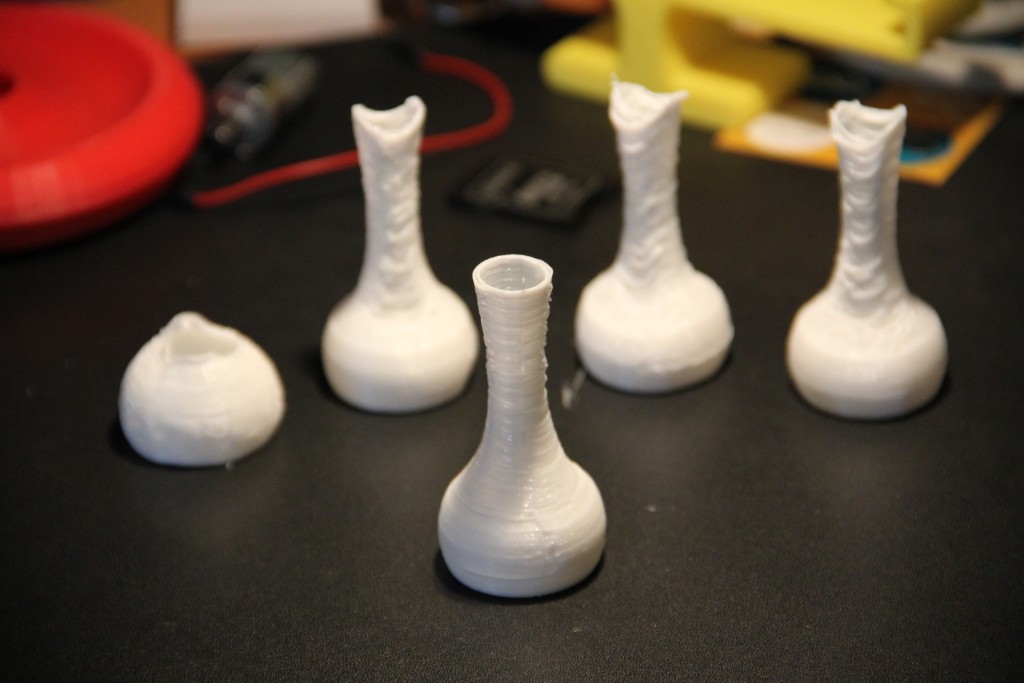
simple 3d printed vase in ninja flex
NinjaFlex printed “Simple Vase”

Take Away:
Definitely a challenge to print with but the rewards might be worth it depending on your end goals.

The Journey:
It might have taken a day or two worth of fiddling around to get the extruder together on our MakerBot Replicator 2X using MakerBot’s extruder upgrade kit ($8: consists of a spring, bearing and a screw). The instructions for the upgrade on the Makerbot site is for a Replicator 2 (NOT the 2X) and the thickness of the extruder block and how they line up are all different so that was a dead end at first.

I ended up using the Thingiverse extruder files created by 3FPD (our make pic: http://www.thingiverse.com/make:87985) and I finally got the stuff to load without bending and buckling (too much).

Lastly it took a day or two of fiddling with the MakerBot profiles to find the right mix of heat/retraction/speed and so on to get a successful print. (for us it didn’t work with the recommended settings and temps)  Above you’ll see some of the prints leading up to the pretty well done Simple Vase print.

The MakerWare (now MakerBot) profile that I used to create the finished “simple vase” and the iPhone 5 bumper posted by Adafruit

Melomuse – Will G.’s Senior Project (Sneak Peek)

At the Ross School, Senior Projects are a big deal. Will is one of the students that we’ve been helping to mentor and he has been working on creating an interactive musical sequencer / MIDI gallery installation for his Senior Project.

Will has been tinkering with a couple of different ways to accomplish his idea. The first one used a SparkFun 4X4 buttons and PCB which had great buttons and beautiful colors… but the number of pins it took was a real challenge.

His most recent version is based on Adafruit’s Trellis platform. After testing a single Trellis board, he fell in love with the system and jumped on the “Hella Untz” which after assembled only takes 4 pins on a Leonardo. Here’s the assembled version and he’s really excited:

A big Step

His final project archive will be posted here: http://seniorproject.ross.org/2015/wgreenberg15/

One Cubic Foot Connector – with MakerBot Customizer

Purpose and Inspiration:

One Square Foot - CubeIn the Innovation Lab this week we had a request from an M-Term trip to create connectors for a group students going to French Polynesia to study marine and coastal ecologies and their biodiversity.

The trip wanted us to create 3D printed corner connectors for the “One Cubic Foot” cubes they were building out of broken or damaged arrow shafts. This project was inspired by National Geographic’s coverage of David Liittschwager’s work (video)

Customize it!
Since there was a good chance that not everyone has broken arrows laying around I took this as the perfect excuse for me to finally learn the basics of MakerBot’s Customizer tool that allows Thingiverse users to create custom 3D files for printing. Users are able to change the radius of the holes and wall thickness in the model and then save the resulting custom-sized corner piece to be printed.

Screen Shot 2014-02-21 at 11.20.51 AMThe tool uses the OpenSCAD modeling language which creates the model from a series of commands. Some of the documentation is great but it definitely has a steep learning curve. Perhaps I’ll create a video tutorial if time permits (before I forget it all).

Result:
It is still in beta since there are a couple of tweaks to be added but it’s up and functional: http://www.thingiverse.com/thing:253081

One Cubic Foot Connector

One Cubic Foot Connector

Deer track

Deer track

Completed "Cubic Foot"

Completed “Cubic Foot”

MakerBot Customizer Corner tool

MakerBot Customizer Corner tool


For those interested in David Liittschawager’s book you can find it here: A World in One Cubic Foot: Portraits of Biodiversity

Neurosky Mindwave & Arduino Connected

Bluetooth Mindwave connection

Bluetooth Mindwave connection

Following a guide on one of Neurosky’s developer pages, we connected their bluetooth enabled Mindwave Mobile headset (an EEG) to an Arduino that had a bluetooth module connected to it.  Also on the breadboard is a LED bar graph that is setup to display the level of “concentration” for the wearer of the synced headset.

Once the bluetooth connection was made and an appropriate Arduino sketch (code) was uploaded,  the computer was able to also display the headset’s values via the Arduino USB serial monitor. (displayed on the screen here)

It should be fairly to easily modify this code and create “mind control devices” that are connected to the Arduino (ie: a motor). We should also be able to capture data from the EEG for future experiments and areas of study.

Neurosky's Mindwave Mobile bluetooth EEG headset and an Arduino with a bluesmirf module.

Neurosky’s Mindwave Mobile bluetooth EEG headset and an Arduino with a bluesmirf module.


This site has some inspirational ideas and experiments: https://backyardbrains.com/experiments/

Quick Video:

Feeling a bit of little inspiration from this idea for a battery

“Harvard University researchers say they’ve developed a new type of battery that could make it economical to store a couple of days of electricity from wind farms and other sources of power. The new battery, which is described in the journal Nature, is based on an organic molecule—called a quinone—that’s found in plants such as rhubarb and can be cheaply synthesized from crude oil. The molecules could reduce, by two-thirds, the cost of energy storage materials in a type of battery called a flow battery, which is particularly well suited to storing large amounts of energy.”

Source: http://www.technologyreview.com/news/523251/new-battery-material-could-help-wind-and-solar-power-go-big/

Un-clogged MakerBot and BlueSmirf prep

A quick test print after filament

A quick test print after filament

Our MakerBot Replicator Dual needed some help. One of the extruders was clogged. It was the type of clog that could only be fixed by partial disassembly. It seems to be pretty happy now but the filament loading sequence seemed to produce an extrusion that periodically sounded like it was slipping. This test print seems to have worked out fine, so we’ll just keep an eye on it.


BlueSmirf

bluetooth for Arduino

Bluetooth hardware with pins added

A BlueSmirf is a bluetooth modem that can be integrated in to Arduino based systems. I’ve added some pins that I’ve bent to allow the card to be positioned vertically from a breadboard for easy test and hopefully better range. The bent pins will likely work well if we plan to integrate it in to a headband or other wearable project later on.

Scallop 3D Cut Out of Clay – CNC Router

So… I finally got around to trying it out. The scallop that I scanned some time ago and have 3D printed in ABS plastic and CNC carved in wood now has been done in clay. I used a chunk of “bone” dry clay and a two stage router bit series. I’m pretty happy with it for a first go round and still have to trim and fire it.

Scallop

CNC routed Scallop with a ShopBot

Trimmed the excess before firing.

Trimmed the excess before firing.

This video shows the router on it’s second finishing pass with a finer bit:

This video gives you an idea of how thick the block is/was:

Can You 3D Print a Bike?

During a week when the students were on break, I was thinking about what could be the largest usable item that we could 3D print? There are lots of models of motors, cars, and other junk for download on thingiverse.com but I was wondering if we could print a skateboard, a scooter, a bike!

I had all but forgot about the idea until recently when Shad had brought up something similar and then we started to brain storm about it and decided to see if we could at least start with making a scooter.

Here is version 0.2 of a wheel for the scooter. (3D printed in ABS, Fill 15%, Shells 2, Layer height 0.2mm)

scooterwheel v02

Arduino Controlled Piano

Abstract:
Using an older Yamaha Disklavier grand piano that has an outdated floppy disk driven interface, we added a Sparkfun MIDI shield to an Arduino to drive the piano. The laptop is connected to the Arduino in the video only to supply power to the microcontroller.

The video shows a program Dr. Morgan wrote that generates a random but vaguely-musical-sounding melody.

photo (3)