Coding for Artists – Video Studio

The setup of the studio space for doing the video instruction has taken much more time than expected. The green screen setup that I was planning on didn’t work in my home office and I didn’t have a quiet enough space at school (work) so I ended up in our basement!

The green sheet I purchased only really worked well once it was put on a frame which I made out of 2 X 4’s and was lit properly. I thought this would be easier but since I ended up setting up in the basement the lighting wasn’t what I expected.

Finding the right cameras with the required features also ended up being a challenge. Although I was planning to use a high end SLR camera to capture the footage, the pass through video didn’t remove the focus box for face detection. There was a trick to make this work, which was to mount the camera upside down, but in the end a new higher level webcam worked out well enough to capture my project.

In the end it might turn out to be the best location and can remained setup for future videos.

Coding for Artists – Outlines and Introductions

With a number of outlines in hand, on the computer, I am ready to start laying out a more detailed framework for the course. The grading rubrics for each of the projects have been roughed out and will need to be reviewed again as the final project descriptions are created.

Working to align all the standards from both CollegeBoard Art AP and the Computer Science Teacher Association (CSTA) has been a challenge but I believe the final weekly projects should meet they easily. It is still a little difficult to tell without real students to work with in this project.

Up next I need to figure out the “introductions” section of the course to greet and welcome students to the tools they will be using.

Coding for Artists

This is the start of a series of blog posts for my capstone project by the same name for Empire State College’s masters degree in Learning and Emerging Technologies.

The “Coding for Artists” project has been inspired by my fellow teachers in the Unified Arts department at East Hampton High School and by the work of Dan Shiffman of the ITP at NYU.

This project is meant to be offered as a teaching resource for teachers looking for a 3 week module to enrich their curriculum. A half year (one semester) length elective course will be developed at East Hampton HS later this school year.

Code.org Logo Made with Code

screen-shot-2016-11-05-at-12-42-06-pm

Code Is Everywhere. Or at least I see it everywhere.

I recently gave out some nice Code.org stickers to my higher level coding students and while going through some of the particulars of how to make rounded rectangle shapes in Processing’s p5.js framework when I realized we were making the base elements of the code.org logo.

This is a pretty basic version that we played with in openProcessing before we moved it to our own hosting to import a font with rounded edges.

To view version 0.1 of the logo: http://code.urbanatwork.com/p5/codeDotOrgLogo1/

To view the code:  See it here on Github

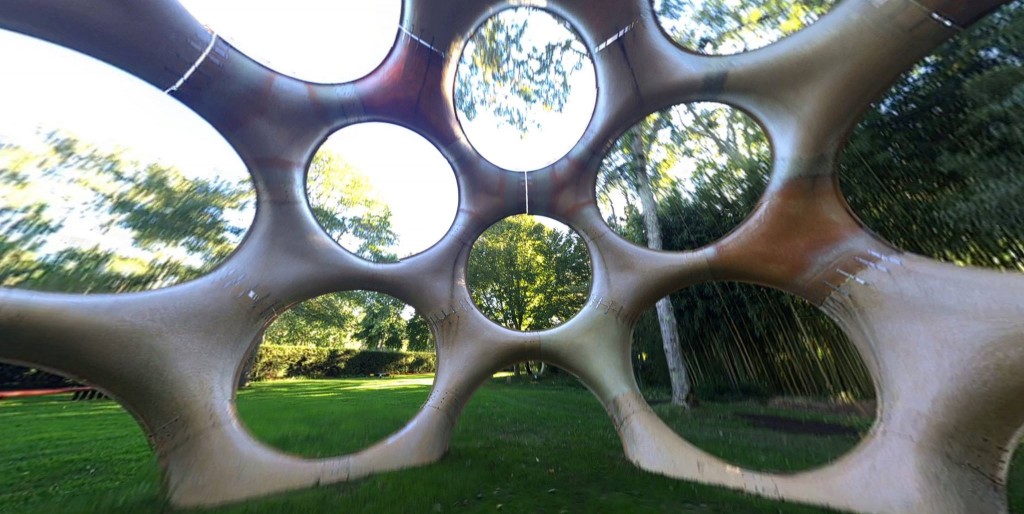
360º Photo with Bubbli at the Long House Reserve


This is photo bubble is from the inside of one of the Long House Reserver’s permanent sculptures.

Photo bubbles like this are nothing new, they have been been around for probably close to 20 years, but the ease of use of the Bubbli iPhone app is pretty nice.  Apple had their version of a photo bubble with Quicktime VR that allowed you to do it and stitch photos together but it was tricky and very time consuming. Microsoft had an iPhone app a few years ago called Photosynth and it was pretty good but didn’t have great support. The Bubbli version has some neat controls and its guided setup is well done and mostly intuitive. The final element that sets Bubbli apart is the addition of captured audio that I didn’t use because of nearby noise but could make many photo bubbles more engaging. It’s worth a try the next time you’re in an interesting fairly static location without to many moving elements.

Long House Reserve - Buckminster Fuller inspired sculpture

Long House Reserve – Buckminster Fuller inspired sculpture

Titled:  Fly’s Eye Dome, 1998
Designed by Buckminster Fuller
Produced by John Kuhtik

The Long House Reserve is located in East Hampton, NY.

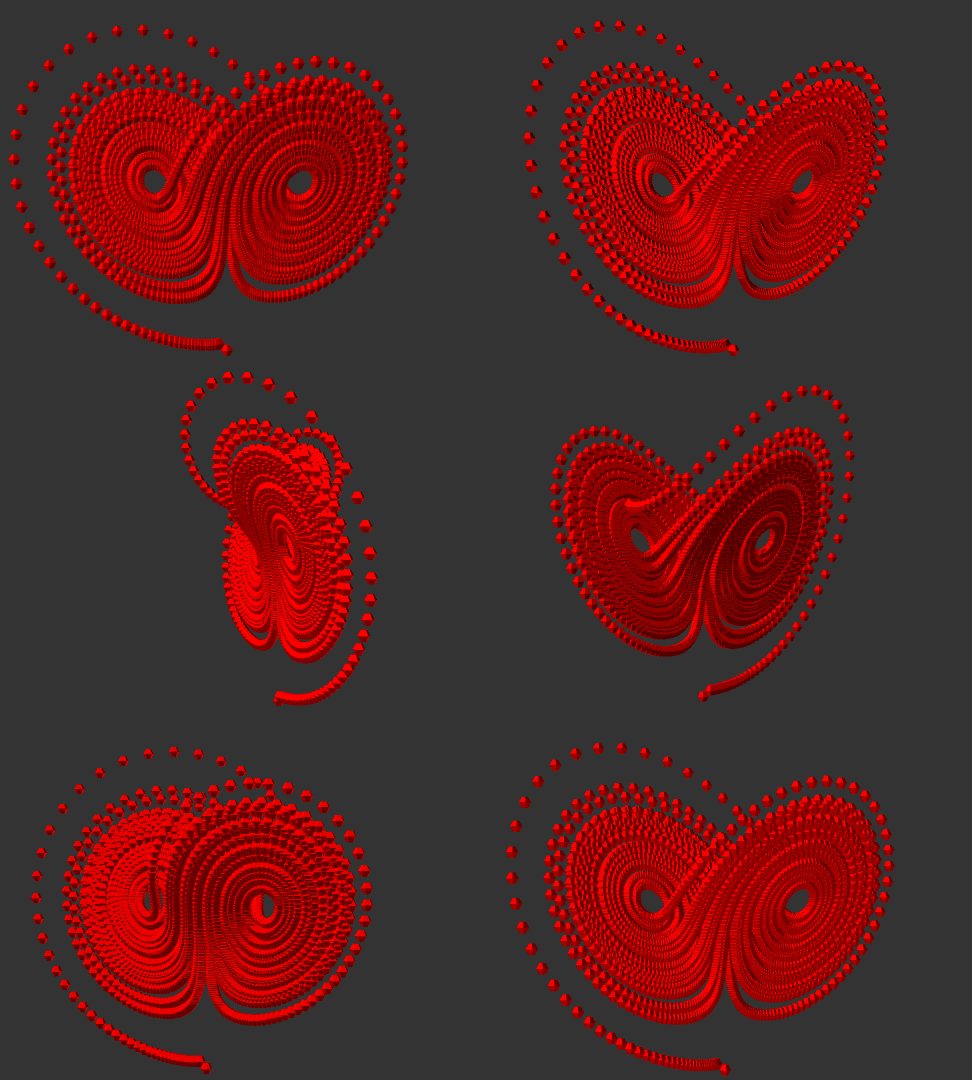
Simple Lorenz System in OpenSCAD

lorenz System OpenSCAD

UPDATE: There is an online version of this here. Just use the customizer to see how it works!  https://www.thingiverse.com/thing:1187587

Chaos theory scientists often like to use this model to show how small changes in initial conditions can result in unanticipated behavior is systems.

This is the Lorenz System that can be tinkered with to see how small changes can have unpredictable results.

This model wasn’t intended to be printed but was more of a challenge to see if it could be modeled in this program.

I would like to thank Dr. David Morgan, atartanian and JeanInNepean for the heavy lifting when it came to this project.


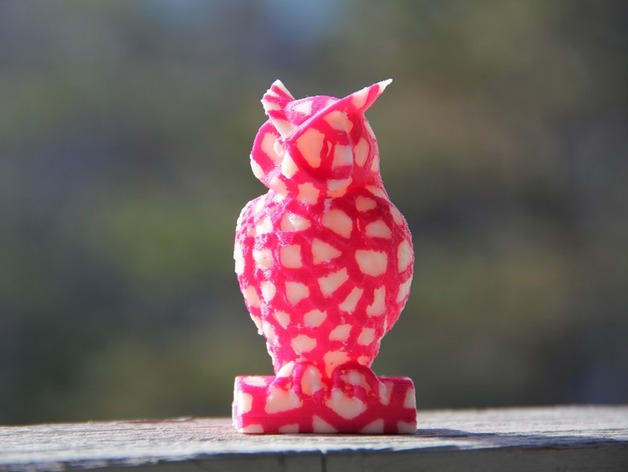
The Voronoi Remixed 3D Printed Owl


Owl VoronoiTHE IDEA:
My 6 year old is really in to owls at the moment. Her Owl Themed Birthday party was loads of fun and that led me, as a good hacker Dad, to play around with some of the popular owl models available on Thingiverse.

I borrowed the older Makerbot Replicator Dual for the weekend, mainly to print out an Owl Cookie Cutter I made in Sketchup 8 (that’ll be a different post). But after printing out the cookie cutter I found myself replacing a stepper motor and rebuiling the extruder (that hasn’t worked for a year). To celebrate this rebuild I looked for a good dual extrusion print to try.  Since I couldn’t find a good owl one, yes we’re still on an owl kick, I remixed our favorite owl from Tom Cushwa using a Voronoi pattern.

The files can be found on Thingiverse here.

THE PROCESS:
I started with MeshLab and struggled through the soundless tutorial below. Then I took the result and did some MeshMixer boolean runs to create the two separate .obj files.  I finished it all off with a trip to NetFabb’s online file repair tool. The whole process took a whole lot longer than I thought it would but so far the results have been pretty nice for a first go at it.  (I am tempted to do a video of the whole thing if anyone would be interested?)

Printing Topless… and Bottomless

Sometimes you run across great models/files on Thingiverse or elsewhere on the net that are solid objects that you’re supposed to print without a “roof” or top layer. The same is sometimes true about printing objects without a floor or bottom.

If you’re using Cura, Slicer or other non-Makerbot software you can find these setting available in the advanced settings, but on Makerware/Makerbot software it is a bit tricker. You’ll need to create and modify a custom profile.

I am not sure why they don’t simply create an “Expert” tab that allows for simple check boxes to turn these features on and off. There have been a couple of folks posting tools to give it that functionality but some of them are more complicated than what we’ve done here.

(Wow, I just checked YouTube and don’t see a video that I thought would be there…. )

Screen Shot 2015-03-03 at 12.30.01 AMTo edit your profile: Go to the “Settings” tab and then click and expand the “Advanced options” . At the bottom you’ll see a “Create Profile” button. Click it and give it a meaningful name.

I often put many of the settings in the name title, S2F20L02 (for shells:2, Fill 20%, Layer Height 0.2mm).

Now you can click on “Edit Profile” if you have TextWrangler on your computer then I suggest using that.

These are the lines that I changed in my file. Note that we have two MakerBot printers with dual extruders so I like to make put a temp in for each extruder.

Screen Shot 2015-03-03 at 12.12.17 AMThese variables are spread through out the miracle.jason settings file so it might be easier to edit with a program like TextWrangler, BrioFlexTrack4which is my preference.

"extruderTemp0": 220,
"extruderTemp1": 220,
"platformTemp": 60,

"roofThickness": 0.0,

"floorThickness": 0.0,

"infillDensity": 0.0,

"doRaft": false,

You can see my entire settings file and one I have used for NinjaFlex (with a special extruder) on my GitHub here.

If you are feeling daring or want to try out other features hidden away here refer to MakerBot’s Custom Slicing documentation here.
Thing shown: “Brio Flex Railtracks” by romanjurt
http://www.thingiverse.com/thing:661462
 

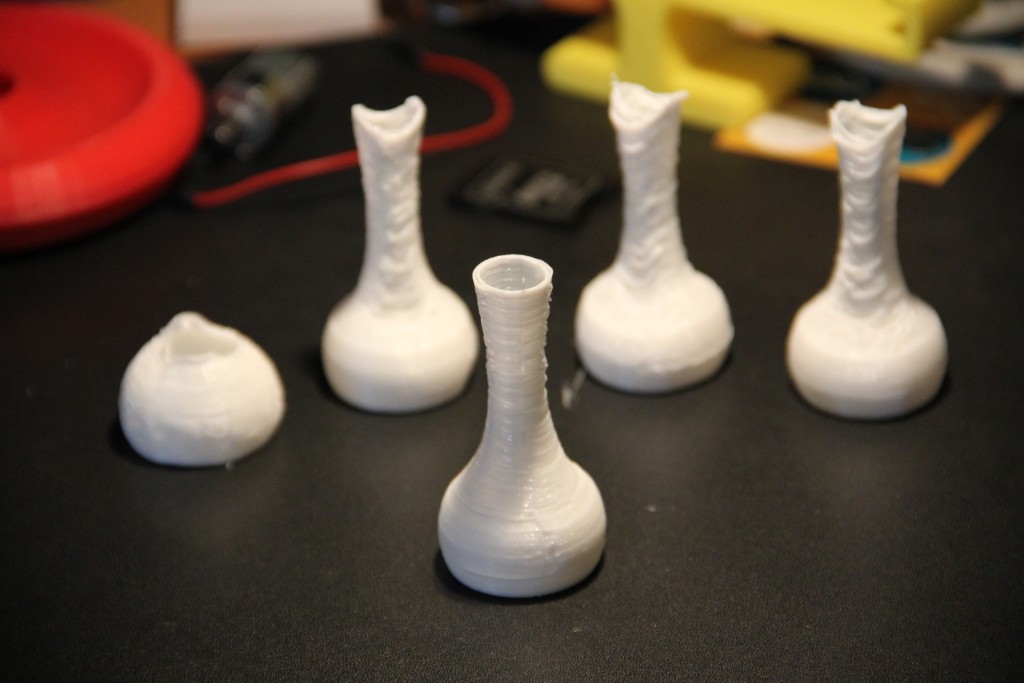
NinjaFlex – Flexible 3D Printer Filament in a MakerBot Replicator 2X

simple 3d printed vase in ninja flex
NinjaFlex printed “Simple Vase”

Take Away:
Definitely a challenge to print with but the rewards might be worth it depending on your end goals.

The Journey:
It might have taken a day or two worth of fiddling around to get the extruder together on our MakerBot Replicator 2X using MakerBot’s extruder upgrade kit ($8: consists of a spring, bearing and a screw). The instructions for the upgrade on the Makerbot site is for a Replicator 2 (NOT the 2X) and the thickness of the extruder block and how they line up are all different so that was a dead end at first.

I ended up using the Thingiverse extruder files created by 3FPD (our make pic: http://www.thingiverse.com/make:87985) and I finally got the stuff to load without bending and buckling (too much).

Lastly it took a day or two of fiddling with the MakerBot profiles to find the right mix of heat/retraction/speed and so on to get a successful print. (for us it didn’t work with the recommended settings and temps)  Above you’ll see some of the prints leading up to the pretty well done Simple Vase print.

The MakerWare (now MakerBot) profile that I used to create the finished “simple vase” and the iPhone 5 bumper posted by Adafruit

Melomuse – Will G.’s Senior Project (Sneak Peek)

At the Ross School, Senior Projects are a big deal. Will is one of the students that we’ve been helping to mentor and he has been working on creating an interactive musical sequencer / MIDI gallery installation for his Senior Project.

Will has been tinkering with a couple of different ways to accomplish his idea. The first one used a SparkFun 4X4 buttons and PCB which had great buttons and beautiful colors… but the number of pins it took was a real challenge.

His most recent version is based on Adafruit’s Trellis platform. After testing a single Trellis board, he fell in love with the system and jumped on the “Hella Untz” which after assembled only takes 4 pins on a Leonardo. Here’s the assembled version and he’s really excited:

A big Step

His final project archive will be posted here: http://seniorproject.ross.org/2015/wgreenberg15/